Your domain name is the digital address that guides visitors to your online presence. If you’re looking to make the switch to MCloud9 for your domain hosting needs, we’re here to make the process smooth and hassle-free. This guide will walk you through the process of transferring a domain to MCloud9, ensuring a smooth transition and access to a range of benefits. Let’s embark on this journey together!
Table of Contents
What Is a Domain?
Before diving into the transfer process, let’s clarify what a domain name is. A domain is the web address that users type into their browsers to access your website. It’s your online identity, and having the right domain is essential for a successful web presence. Did you know that as of 2021, there were over 1.3 million .co.za domain names registered?
To better understand what a domain is and its importance, you can check out our comprehensive guide on website domain names.
Transferring a Domain to MCloud9
Transferring your domain to MCloud9 is a breeze. Follow these steps to seamlessly transition your domain and unlock a world of hosting advantages.
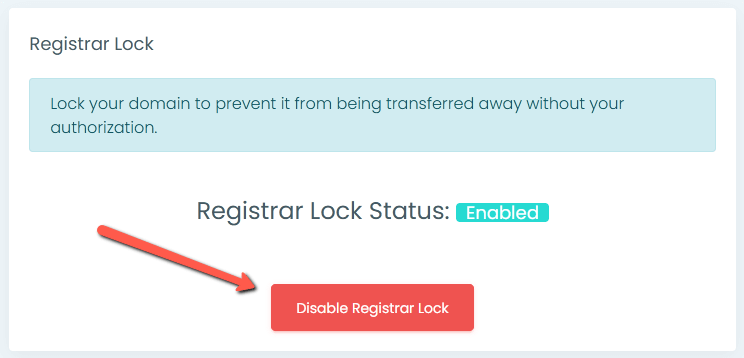
Step 1: Unlock the Domain With Your Current Registrar
Begin by unlocking your domain with your current domain registrar. If you’re uncertain how to proceed, don’t hesitate to reach out to them for guidance. In case they’re unable to assist, feel free to reach out to our friendly support team for expert help.
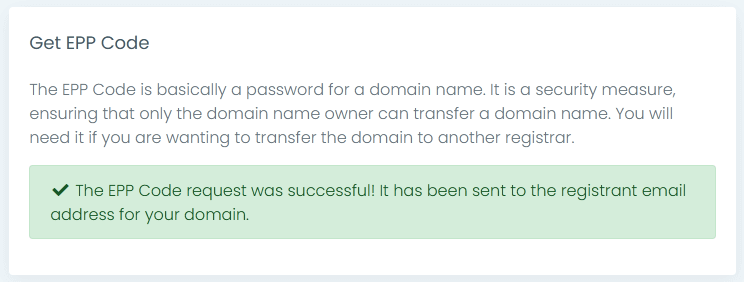
Step 2: Get the Authorization Code
Also known as an EPP Code or Transfer Key, the Authorization Code is essential for the transfer process. Ensure that the administrator’s contact information for your domain is up to date, as the associated email address may be used during the transfer. Retrieve the Authorization Code from your current registrar to proceed. This option can usually be found in your domain management settings. If your current domain registrar is unable to assist, our dedicated support team is ready to help you out.
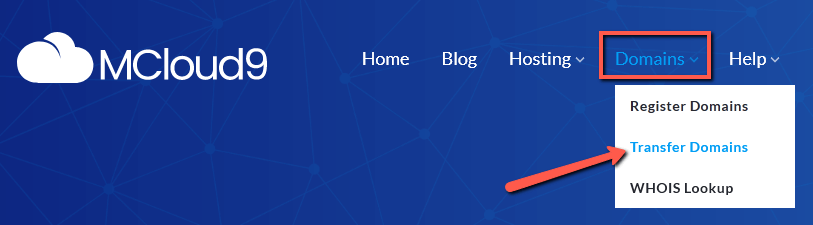
Step 3: Begin the Transfer Process with MCloud9
To begin the domain transfer process, visit the MCloud9 website and navigate to the domain transfer page by selecting the “Domains” tab from the top navigation on the MCloud9 Home page and choosing “Transfer Domains“.
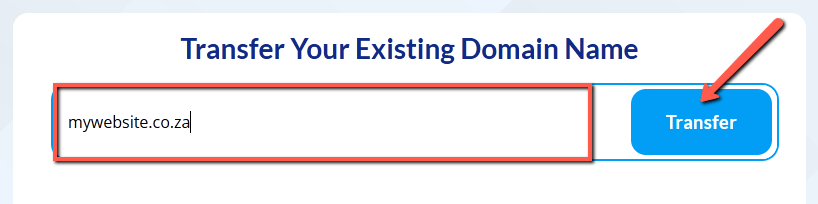
Step 4: Enter the Domain You Wish To Transfer
Enter the domain you want to transfer. Make sure to provide the correct domain name and extension (e.g., “mywebsite.co.za”). Check our list of supported domains to confirm compatibility. If your domain extension isn’t listed, reach out to us via our Contact Us page for assistance.
After you’ve entered the domain, select “Transfer”.
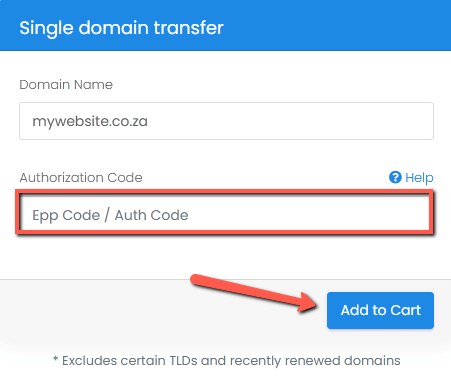
Step 5: Enter the Authorization Code
Enter the Authorization code (EPP code) from your current registrar and select “Add to Cart“.
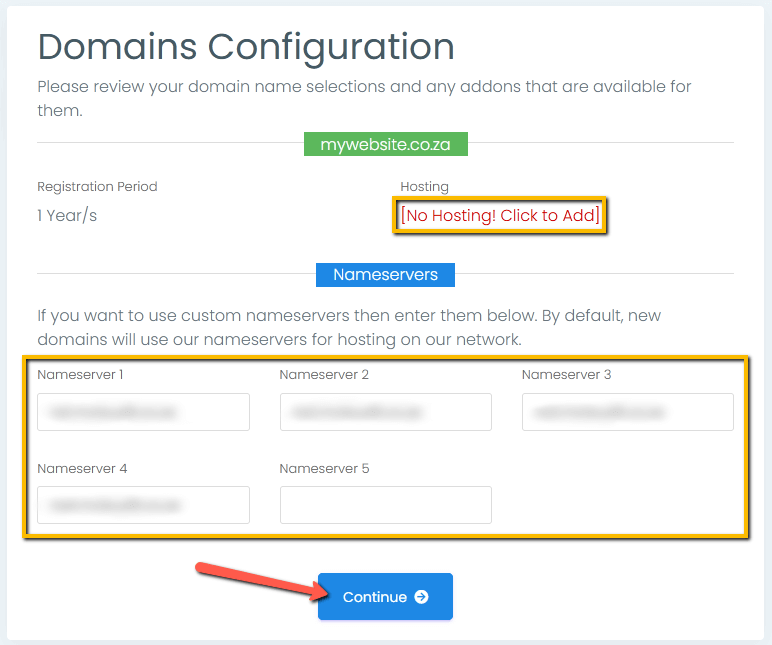
Step 6: Configure Your Domain Settings
On the Domains Configuration page, you can also fine-tune your domain settings, add hosting services if needed, and configure domain nameservers. If you’re hosting with MCloud9, stick with the default nameserver settings.
Once you’re happy with the settings, select “Continue“.
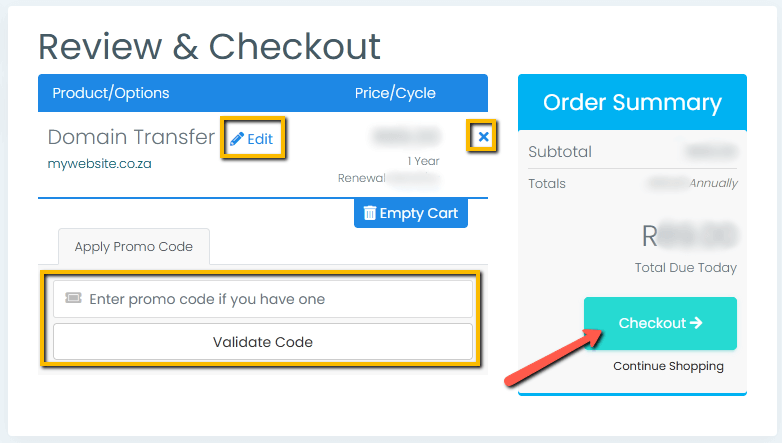
Step 7: Review and Checkout
Thoroughly review your order for accuracy. You can edit or remove items by clicking the “edit” button or the “x” (remove) icon. If you have a promo code, enter it in the designated field.
When you’re satisfied, click “Checkout”.
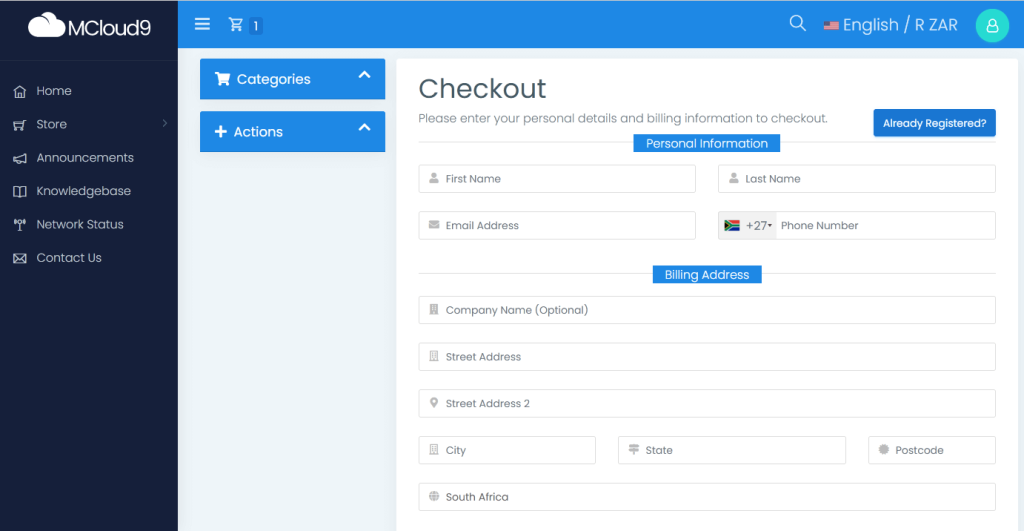
Step 8: Fill In Your Billing Information
On the checkout page, fill in the required billing details. If you already have an account with MCloud9, select “Already Registered” to log in and have your details automatically filled in.
Once you’ve filled in your information, check the box to agree to the Terms of Service and select “Complete Order“.

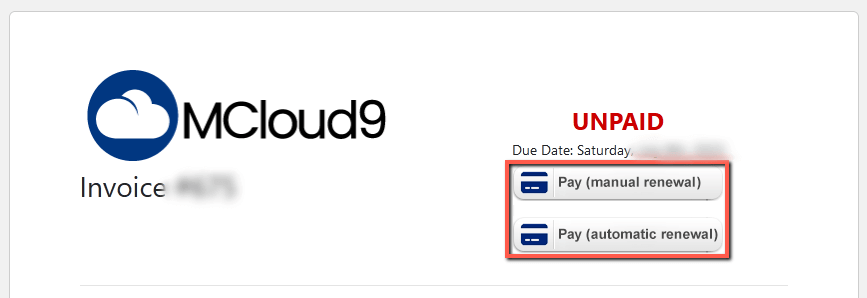
Step 9: View and Pay Your Invoice
On the invoice page, you’ll find two payment options: “Pay (automatic renewal)” and “Pay (manual renewal).” The “Pay (automatic renewal)” option automatically renews your services before they expire. The “Pay (manual renewal)” option requires manual renewal, including re-entering your payment details each time.
Choose the option that suits you best.
Step 10: Complete Your Payment
You’ll be directed to our secure payment gateway. Select your preferred payment method, such as credit card or debit card, and complete the payment process. We offer a variety of payment methods to ensure a seamless and convenient experience for you.
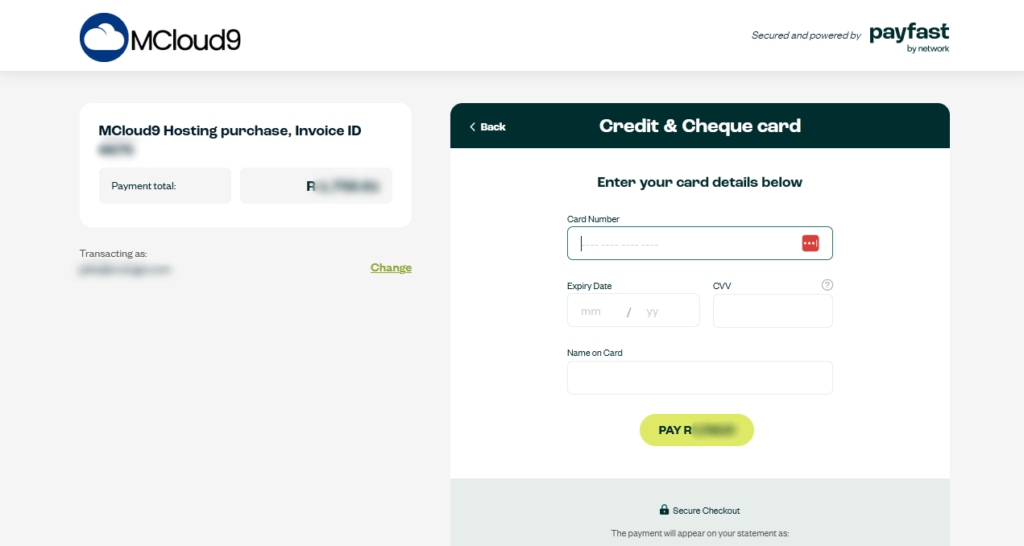
Ta-da! After following these steps you will have successfully transferred your domain to MCloud9. After completing the payment, you’ll be redirected back to the paid invoice. You’ll also receive an email with your invoice and links to your Client Portal, where you can manage your services.
If you need any further assistance with your domain, our comprehensive self-help knowledgebase provides all the resources you need to get started and our helpful support team is available if you have any questions.
Advantages of MCloud9 Domains
When transferring or registering a domain with MCloud9, you’ll enjoy numerous benefits. Our free privacy protection shields your personal information from public view, while our domain security features guard against unauthorised access and threats. The intuitive Client Portal simplifies domain management, making your experience secure and convenient.
FAQ for Transferring Your Domain to MCloud9
Is hosting included when I transfer my domain to MCloud9?
No, domain transfer and hosting are separate services. However, you can easily add a hosting plan or integrate your transferred domain with an existing hosting service for a complete online presence.
Can I transfer my domain without changing my hosting?
Absolutely! You can transfer your domain to MCloud9 while keeping your existing hosting setup intact.
In Conclusion
Congratulations! You’ve successfully learned how to transfer your domain to MCloud9, unlocking a world of benefits and services. Our user-friendly process ensures a seamless transition, backed by our dedicated support team. Remember, your domain is the foundation of your online presence, and with MCloud9, managing it is secure, convenient, and hassle-free. Welcome to the MCloud9 family!
